4. Quick start
This is a quick start guide to help you set up the environment and run the codebase. In order to simplify the process, we will use Gazebo simulation to demonstrate the process in this guide. If you want to run the codebase on a real robot, you need to modify the settings according to your robot configuration.
Before you start, make sure you have read the CodeBase Overview section and fully understand our architecture. This will help you better comprehend the purpose of each step.
Warning
To enhance the possibility of reproduction, we provide Dockerfile and Docker Compose to help you set up the environment. However, due to variations in the actual configurations, some Docker settings may need to be adjusted manually.
Clone the repository:
git clone https://github.com/YuZhong-Chen/LLM-Navigation.git -b hydra-sim-gazebo
Start the ros1_bridge
Please modify the ROS_HOSTNAME and ROS_MASTER_URI in the ros1_bridge_ws/docker/.env based on your computer setup.
Then, use docker compose up to create the ros1_bridge container and start the ros1_bridge.
Bring-up the Robot in Gazebo
In the kobuki_ws directory, use the command docker compose up to start the docker container and use the command ros2 launch gazebo_rl_env rl_env.launch.py to
start the Gazebo simulation with the Kobuki robot.
Generate the 3D Scene Graph by Hydra
In the hydra_ws directory, use the command docker compose run --rm --build hydra-ws-build to build the environment.
After the environment is built, use the command docker compose run --rm hydra-ws to run the container,
and use the command below to generate the 3D scene graph:
cd ~/catkin_ws
source devel/setup.bash
roslaunch hydra_ros uhumans2.launch zmq_ip:=127.0.0.1
Use keyboard teleoperation to move the robot in Gazebo:
ros2 run teleop_twist_keyboard teleop_twist_keyboard
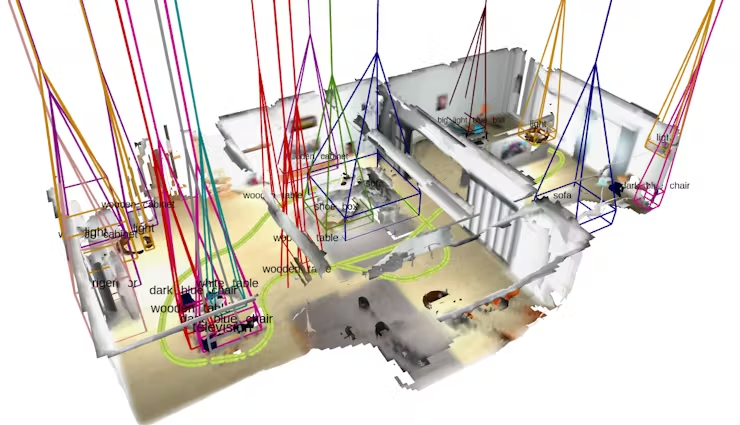
After you finish the above steps, you should be able to see the 3D scene graph in Rviz !

The screenshot of the 3D scene graph in Rviz